Use this flooring quote guide to compare materials, labor, prep, and warranties, then choose an estimate that fits your Northern Colorado home and budget.
Guide to Hardwood Installation Process at Home
A new hardwood floor can make a room feel finished in a way few updates can. It also has very little patience for shortcuts. This guide to hardwood installation process shows what happens before, during, and after installation so you can plan confidently, protect your investment, and avoid the surprises that can delay a remodel.
Hardwood is a natural material, not a printed surface. It responds to moisture, temperature, subfloor conditions, and the way your home is used. Professional installation is what turns beautiful planks into a floor that stays flat, stable, and comfortable underfoot for years.
Start With the Right Hardwood for Your Home
The installation process begins well before a crew arrives. First, choose a hardwood product that fits the room, your lifestyle, and the conditions of the home. Solid hardwood is a classic choice with a thick wear layer that can typically be refinished multiple times. It works especially well in dry, climate-controlled spaces above grade.
Engineered hardwood has a real wood surface over a layered core. That construction offers more dimensional stability, making it a smart option for many homes where seasonal dryness, radiant heat, or a concrete subfloor may be factors. Neither choice is automatically better. The right answer depends on the space and the installation method it allows.
Wood species, plank width, color, and finish matter, too. Wide planks can give an open-concept room a clean, current look, but they make subfloor flatness and moisture control even more critical. A wire-brushed or textured finish can be more forgiving of everyday pet claws and active family life than a very smooth, high-gloss floor. During an in-home consultation, samples can be viewed in your actual lighting alongside cabinets, trim, and furniture, rather than under showroom lights.
The Guide to Hardwood Installation Process: What Happens First
Measure, inspect, and write a clear plan
A professional measure does more than calculate square footage. The installer checks room transitions, stairs, door clearances, floor vents, closets, and the direction the planks should run. They also assess the existing floor and subfloor. This is where a reliable estimate is built, including materials, removal if needed, installation, trim, and any repair work discovered in advance.
A careful inspection helps prevent common issues later. Floors may need to be removed, cabinets may affect the installation area, and doors may need to be trimmed so they clear the new height of the flooring. Knowing these details upfront is far easier than solving them after the job has started.
Prepare the subfloor properly
The subfloor is the foundation for every hardwood plank. It must be clean, dry, structurally sound, and flat within the manufacturer’s requirements. “Flat” is not the same as “level.” A floor can slope slightly across a room and still be suitable, but dips and high spots can cause movement, squeaks, gaps, or uneven-looking boards.
Installers may scrape adhesive, remove staples, sand down high areas, or use an approved patching material to correct low spots. On concrete, moisture testing is essential. On wood subfloors, loose panels may need to be secured. This prep work is not the glamorous part of a flooring project, but it has a major impact on the final result.
Moisture management deserves special attention in Northern Colorado. Our dry climate can make homeowners assume moisture is never a concern, yet concrete slabs, crawl spaces, seasonal changes, and indoor humidity can all affect wood. A qualified installer tests conditions and follows the product manufacturer’s specifications for moisture barriers, underlayment, adhesives, or fasteners.
Allow the flooring to adjust when required
Some hardwood products need time in the home before installation so the wood can adjust to normal indoor conditions. This is called acclimation. The required timing varies by product, species, construction, jobsite conditions, and manufacturer instructions. It is not a one-size-fits-all waiting period.
The home should be operating under normal living conditions, usually with heating or cooling running, before acclimation and installation. Bringing boxes of wood into an unfinished or unconditioned house does not solve the problem. Your installer will confirm the appropriate schedule for the flooring you selected.
What Installation Day Looks Like
Before the crew arrives, clear the work area of small furniture, fragile items, and personal belongings. Confirm who is moving larger furniture if that service is included. Keep children and pets away from the workspace, and expect some noise from saws, fastening tools, and removal equipment.
The crew typically begins by protecting nearby surfaces and removing the existing flooring if that is part of the project. Baseboards may be carefully removed and reinstalled, or new shoe molding may be used to cover the necessary expansion space around the perimeter. The exact approach depends on the trim, wall condition, and homeowner preference.
Then comes layout. Installers establish a straight starting line and plan the board pattern so the floor looks balanced at walls, doorways, and transitions. They blend boards from several cartons to distribute natural color and grain variation. This is a real advantage of skilled installation: wood is supposed to vary, but thoughtful board selection keeps one area from looking noticeably darker or lighter than the rest.
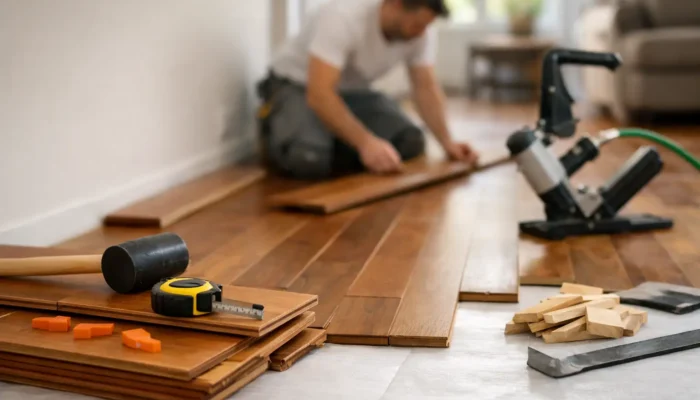
The installation method depends on the product and subfloor. Solid hardwood is often nailed or stapled to a suitable wood subfloor. Engineered hardwood may be nailed, glued, floated, or installed with a combination of methods. Glue-down installations require careful adhesive selection, correct trowel use, and cleanup as the work progresses. Floating floors require precise locking connections and proper expansion room.
Every hardwood floor needs space to expand and contract with changes in humidity. That perimeter gap is intentionally left around walls and fixed objects, then covered with baseboard or shoe molding. Skipping it can lead to boards pressing together, cupping, or buckling. It is one of the small details that separates a floor that simply looks good on day one from one that performs well over time.
Finishing Details That Make the Floor Feel Complete
Once the main field of flooring is installed, the crew handles transitions between rooms and between different flooring types. Reducers, T-moldings, stair nosings, and end caps are selected to create safe, finished edges where hardwood meets tile, carpet, luxury vinyl, or exterior doors.
The team then checks for visible gaps, adhesive residue, loose trim, and boards that need final attention. For prefinished hardwood, the floor is generally ready once the installation and any adhesive cure requirements are complete. Site-finished hardwood takes longer because it is sanded and finished in place, with drying and curing time between coats. It can deliver a custom color and a smooth, continuous appearance, but it involves more time, dust control, and limited access to the space.
When you receive care instructions, follow them closely. Use felt pads under furniture, clean spills promptly, and avoid soaking a wood floor with water. A hardwood-specific cleaner is safer than steam mops, oil soaps, or harsh all-purpose products. Area rugs are helpful in entryways and high-traffic zones, but wait until the finish or adhesive has cured if your installer advises it.
When Professional Installation Is Worth It
DIY hardwood installation can seem like a way to save money, but the hidden costs can add up quickly. Specialized tools, wasted material, moisture mistakes, damaged planks, and warranty limitations can erase the expected savings. More importantly, correcting a failed wood floor is far more expensive than installing it correctly the first time.
Professional installation is especially valuable when a project includes stairs, long runs through multiple rooms, uneven subfloors, concrete, radiant heat, or detailed transitions. It also gives homeowners one coordinated plan for material selection, measuring, product ordering, scheduling, and installation instead of juggling separate retailers and contractors.
Choice Floors Northern Colorado brings flooring samples and practical guidance directly to your home, helping you compare hardwood options where they will actually live. You can make decisions around your budget, pets, children, existing finishes, and timeline, then receive a written estimate before the work begins.
A hardwood floor is not just a purchase for the next season. Give the preparation the same attention you give the color and plank width, and you will have a floor that feels right every time you walk through the door.

Related Posts