Use this flooring quote guide to compare materials, labor, prep, and warranties, then choose an estimate that fits your Northern Colorado home and budget.
How to Measure Rooms for Flooring Accurately
A flooring project can look straightforward until you realize the room is not actually a rectangle. A bay window, hallway, closet, angled wall, or kitchen island can change the amount of material you need – and the price you expect to pay. Knowing how to measure rooms for flooring gives you a realistic starting point before you compare products or request an in-home estimate.
You do not need to measure with installer-level precision to begin shopping. You do need a clear sketch, consistent measurements, and enough room in your calculations for cuts, pattern matching, and the unexpected details that older homes often bring.
Start With the Right Tools and a Simple Sketch
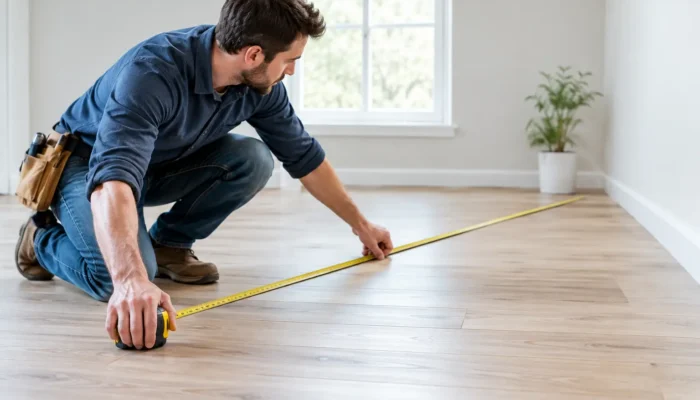
Use a tape measure that is long enough for the space, ideally 25 feet or longer. A laser measure can make larger rooms faster to measure, but it is smart to confirm key dimensions with a tape measure. Keep a pencil, paper, calculator, and your phone handy for photos.
Before measuring, draw a basic overhead sketch of each room. It does not need to be pretty. Mark doors, closets, hallways, fireplace hearths, islands, permanent cabinets, and any area that will not receive flooring. Label every wall as you measure it.
Measure from wall to wall at the baseboards, not from furniture to furniture. Move lightweight furniture when possible, and measure behind large pieces as accurately as you can. Photos of each wall and transition are useful later, especially if you are discussing your project with a flooring consultant.
How to Measure Rooms for Flooring in Square Feet
For a square or rectangular room, the formula is simple:
Length x width = square footage
If your living room measures 15 feet long by 12 feet wide, multiply 15 by 12. The room is 180 square feet.
If you measure in inches, convert the inches to feet before calculating. For example, 12 feet 6 inches becomes 12.5 feet. A room that is 12.5 feet by 10 feet equals 125 square feet. Rounding measurements up slightly is safer than rounding down when you are estimating material.
Write down the square footage of every separate area, then add the totals together. A bedroom measuring 144 square feet and an attached 30-square-foot closet require 174 square feet of flooring before you factor in waste.
This calculation works well for luxury vinyl plank, laminate, hardwood, tile, and carpet, but the amount you order will not always match the room’s exact square footage. The product and layout matter.
Do You Subtract Cabinets, Islands, and Appliances?
It depends on what is permanently in place and how the flooring will be installed. For a quick budget estimate, many homeowners measure the entire footprint of the room. This helps avoid underestimating material and is often appropriate when replacing flooring throughout a kitchen or open living area.
For a detailed quote, permanent cabinets and large fixed islands may be excluded, since flooring typically does not run beneath them. Freestanding appliances are different. Flooring may extend beneath a refrigerator, range, or dishwasher area depending on the installation plan.
Do not subtract small obstacles such as a narrow fireplace edge or a floor register from your own estimate. Those small areas are usually better treated as part of the waste allowance.
Break Odd-Shaped Rooms Into Smaller Rectangles
L-shaped rooms, bump-outs, angled spaces, and connected living areas are where most measurement mistakes happen. The easiest solution is to divide the room into simple rectangles or squares.
For an L-shaped room, measure the longer main rectangle first. Then measure the smaller extension. Calculate each section separately and add them together. For example, a 14-by-12-foot main area is 168 square feet. A 6-by-5-foot extension adds 30 square feet, for a total of 198 square feet.
For a bay window or curved area, measure the widest and deepest points and treat it as a small rectangle for planning purposes. A professional measure can refine the number later. It is better to allow a little extra material than to come up short after installation has started.
Hallways should be measured separately, including their full length and width. They may be small in square footage, but they can require more cuts than a simple room. Hallways also affect the direction flooring will run, which can influence waste and the finished appearance.
Add the Right Waste Allowance
Waste is not a mistake. It is the material needed for trimming edges, fitting around door jambs, making repairs, and aligning patterns or plank runs. The right allowance depends on the flooring you choose and the shape of your rooms.
For straightforward rooms with luxury vinyl, laminate, or hardwood, plan on adding about 5% to 10%. A 500-square-foot project with a 10% allowance means ordering about 550 square feet of material.
Use a larger allowance, often 10% to 15%, for rooms with many angles, closets, diagonal layouts, wide-plank hardwood, or products with a strong visual pattern. Diagonal installation looks distinctive, but it creates more offcuts. Patterned carpet also needs extra material so the design aligns correctly from one piece to the next.
Carpet requires a different approach because it comes in rolls with fixed widths, commonly 12 feet. A room that measures 13 feet wide cannot simply be ordered as 13 feet by the room length. It may require a seam, a different layout, or additional carpet to make the dimensions work. That is one reason carpet measuring is best confirmed by an experienced installer.
Measure Doorways, Transitions, and Stairs
Your total square footage is only one part of a flooring plan. Note every doorway where the new floor meets a different material. These transitions may need a reducer, T-molding, threshold, or other finishing piece. Measure the doorway width so your estimate includes the right trim.
Also note whether doors may need to be trimmed after the new floor is installed. Luxury vinyl and laminate can raise the finished floor height, while carpet and padding create a different transition. Door clearances, baseboards, shoe molding, and stair nosings should be considered before installation day.
For stairs, measure each tread and riser separately. Multiply the tread depth by the stair width, then multiply the riser height by the stair width. Add those figures together and multiply by the number of steps. Stair carpet has additional layout requirements, and hard-surface stairs often need matching nosings, so a professional site measure is particularly valuable here.
Keep Your Estimate Separate From a Final Measure
Measuring your rooms helps you set a budget and compare flooring options with confidence. It should not replace a final on-site measure before materials are ordered. Walls are not always square, closets can be deeper than expected, and installers need to account for subfloor conditions, moisture concerns, transitions, and product-specific installation requirements.
That final measurement also protects you from ordering too little or paying for unnecessary excess. At Choice Floors Northern Colorado, an in-home consultation lets you see flooring samples in your actual lighting while a flooring professional confirms measurements and discusses what works best for your family, pets, style, and budget.
A Quick Measurement Checklist Before Your Appointment
Bring your room sketch, individual wall measurements, approximate square footage, and photos of unusual areas. Note which rooms will receive the same flooring, where flooring changes occur, and whether you want it installed under appliances or around fixed features. If you are replacing existing carpet, mention whether you want new padding as well.
One more practical tip: measure twice before making any budget decisions. A few extra minutes spent checking a hallway, closet, or open-plan connection can save you from a frustrating surprise later. Your initial numbers do not have to be perfect – they just need to give you a clear picture of your project, so the final flooring plan can be built around your home instead of a showroom guess.

Related Posts